
Our family really enjoys Kombucha and, Continuous Brew Kombucha is even better! Why? It is so much easier! I am all for making my life easier!
I keep 8+ gallons of kombucha going on a brew cycle at a time! Once the fermentation is complete, we keg it, put it on tap and have fresh fizzy kombucha available all the time!
To refresh your memory from my How to Make Kombucha article:
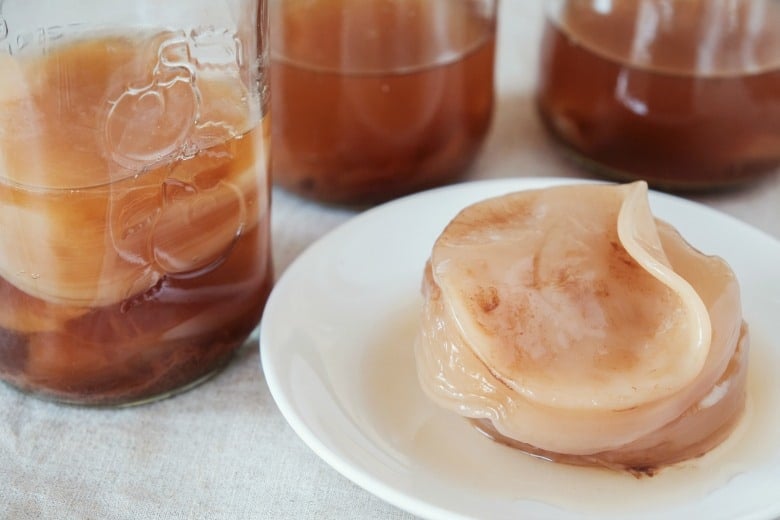
Kombucha is a naturally carbonated tea that starts with a Kombucha scoby (also called a starter or mushroom) which looks like a flat grayish disk.
Since the scoby does grow and multiply, if you know of someone who already makes Kombucha, they may share with you.

Kombucha is so good for you!
It is a delicious drink made from sweet tea and is slightly carbonated! It is a great way to get started with fermented foods.
Being full of probiotics, B vitamins and enzymes, it also tastes great. It's all the little cultures inside, giving us health and making our bodies feel good.
Like most things, making it at home costs pennies if you have a proper system. Compare this to a bottle you can buy in the store, where a bottle goes for $3 - $4!
It's amazing the prices people charge for simple, good food.
If you haven't tried making your own, it really is easy to make!
But how is kombucha made?
It all starts with a scoby, a fermented little disc that kickstarts the whole process at the beginning. This is where all the goodness your body wants comes in.
Often people find their scoby (and other kombucha-brewing friends) through local kombucha communities. You can purchase your own first scoby from my affiliate partner here.
But anyway, back to kombucha. I like kombucha even better since I started making continuous brew kombucha. Why? It is so much easier and makes better quality kombucha!
Why is Continuous Brew Kombucha Better Quality?
I'm glad you asked!
Cleaning of the entire at-home kombucha system is done only when the spigot is plugged.
The tiny ecosystem established by the continuous brew process is not disturbed when starting a new batch and this gives consistently good quality kombucha.
Kombucha is a probiotic drink that gives your gut the beneficial bacteria to keep it healthy.
How I Began Making Kombucha
When I first started making Kombucha, I did not use the continuous brew Kombucha method.
I used 1-gallon glass jars whenever I wanted some.
With so many people drinking kombucha in my family, the top of my refrigerator was quickly covered in jars! We would drink the kombucha straight or make special flavored versions like fruit flavored kombucha.
So I was all for anything that made for less work on my part!
I began to research the continuous brew kombucha method and thought it sounded like a great idea!
Benefits of Continuous Brew Kombucha:
- Less maintenance is required. You simply add new sweetened tea to begin a new batch. Cleaning is required only when the spigot is clogged with yeast sediment or too much sediment is on the bottom.
- Increased chance of successful brewing. Since the ecosystem is not disturbed, there is little chance of contamination with mold and bacteria.
- A healthier scoby is maintained. The ecosystem developed during the fermentation process is not disturbed when beginning a new batch. The yeast and bacteria are allowed to ferment undisturbed.
- Consistency in supply is achieved. You may choose to take off small amounts of kombucha at more frequent intervals or do it all at once. As I will show you shortly in my step by step tutorial, the continuous brewing method requires no direct contact with the scoby. This means you avoid contamination of the scoby. Remember the scoby (also called starter or mushroom) is reused from one batch to the next and consists of yeast and bacteria which live together in a symbiotic relationship. SCOBY is an acronym for Symbiotic Colony of Bacteria and Yeast
Continuous Brew Kombucha Methods:
- Removing small amounts at more frequent intervals – this can be removing enough kombucha for one day or for one week.
- Allowing the kombucha to ferment for 2 – 4 weeks (depending on the quantity and taste desired) then removing 80% of the container contents and beginning a new batch.
I do the latter.
While kombucha is naturally slightly fizzy, we put ours in a kegerator and have it on tap for the children to enjoy at will.
Don’t worry though, if you do not keg your kombucha, simply put it in the refrigerator and enjoy!
Tips For Making Homemade Kombucha
- Make sure to use non-chlorinated water as chlorine will kill the scoby.
- The scoby needs sugar to live on – honey, rapadura or sugar substitutes will not work.
- Flavored black tea works well but I do not use herbal tea.
My Continuous Brew Kombucha Set-Up
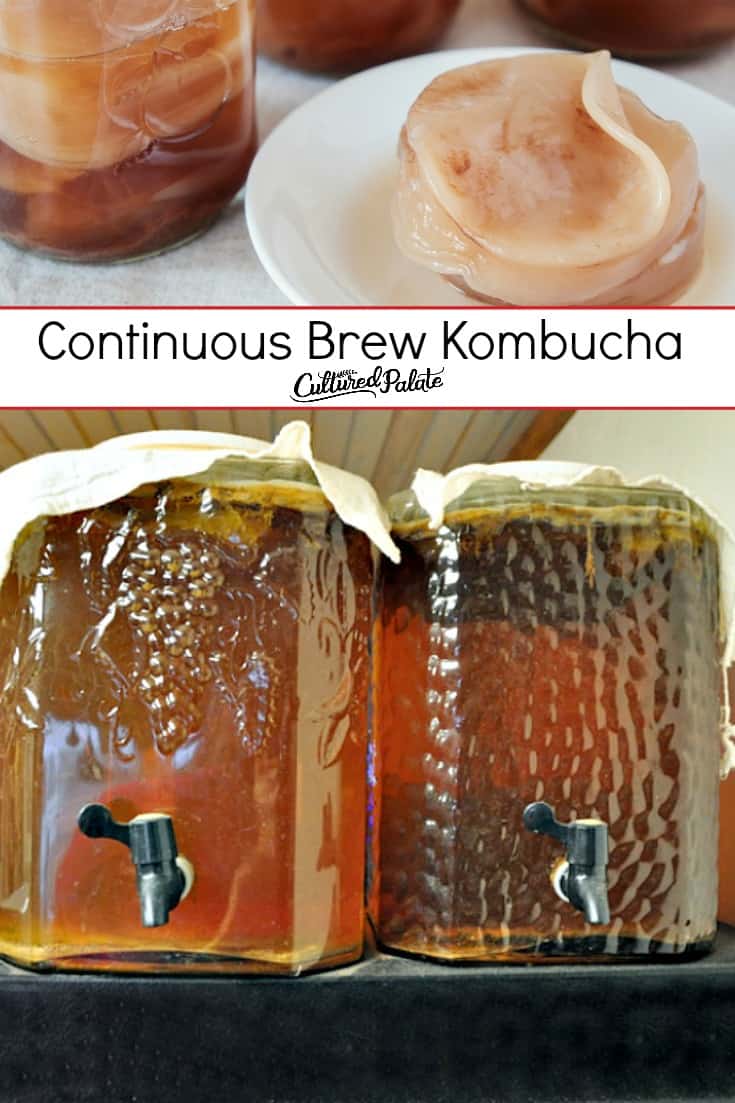
I use two 4.75 gallon glass beverage dispensers – that’s right, I have over 8 gallons of kombucha brewing at a time!
I also use a tea towels secured with a rubber band as lids. This is to prevent fruit fly invasion!
Containers Must Let Air In But Keep Critters Out!
When I started the continuous brewing system, I used two 3 gallon plastic tea dispensers.
I knew the tops were not tight fitting which is good because the scoby needs air circulation.
What I did not realize, however, is that as the tea fermented the tops popped up allowing critters in! Awful isn't it?
We had fruit flies invading and contaminating the scoby. Not to gross you out, but, I had maggots on the scoby - yuck!!!
Fortunately, the live kombucha scoby forms in layers. The older the scoby, the thicker it is. I was able to peel the top layer off without harming the scoby and begin a fresh batch.
I had already been looking for larger containers because we have been running out of kombucha before the next batch was ready.
When I saw 4.75 gallon glass beverage dispensers for sale at Sam's Club - I bought two of them!
They came with wrought iron stands and glass tops which I boxed up and have in storage.
To solve the air circulation problem but still keep critters out, I covered each jar with a double layer of cheesecloth and secured it with a rubber band.
📋 Recipe
Continuous Brew Kombucha (for 1 gallon but easily multiplied)
Ingredients
- 13 cups water non-chlorinated
- 2 Tbsp. loose organic tea or 8 tea bags
- 1 cups sugar
- 2 cups kombucha from a previous batch
- 1 kombucha scoby
Instructions
Preparation:
-
Be sure all equipment is clean and rinse thoroughly so no traces of soap remain – you may also use vinegar to clean your equipment.
-
Brew the tea by bringing water to a boil and adding the tea bags. Allow the tea to steep until cool and remove the tea bags.
-
Add sugar to the tea and stir until dissolved.
-
Allow to cool to room temperature. This is very important as hot tea will kill the scoby.
-
Place the kombucha from a previous batch and the sweetened tea into the continuous brew container.
Add the scoby.
-
Put a piece of cheesecloth over the top of the jar and secure with a rubber band – this allows air in but keeps bugs and dust out.
-
Place the jar in an out of the way place and allow to ferment
-
If your kitchen is warm, the kombucha will ferment more quickly, so for the first batch, taste it after a few days. Once the taste is to your liking, follow the steps below.
Subsequent Batches:
-
Prepare the tea as above, sweeten and allow to cool completely.
-
Drain the fermented kombucha into the desired container. Since we keg ours, we use clean tubing and drain it directly into the keg. My containers are on top of the refrigerator and this allows them to be emptied without moving. The tubing used is food grade and does not come into contact with the scoby.
-
Leave about 20% of the batch in the container to use for the next batch. You can see the layers of the scoby, as well as, the yeast sediment in the bottom.
-
Now you are ready to refill the container with new sweetened tea to feed the scoby. Add the tea gently. I pour it right on top of the scoby which may sink or be pushed down during this process but always rises to the top again. There is no need to mix the new tea mixture with the amount left from the previous batch, the fermentation process takes care of this!
-
Cover the top with a lid or tightly woven cloth and secure with a rubber band. Allow the fresh batch 10 days to 3 weeks to ferment. The time will depend on the batch size and the size of your scoby. Taste the kombucha every week or so until the desired taste is acquired.
Notes
Tips For Making Homemade Kombucha;
- Make sure to use non-chlorinated water as chlorine will kill the scoby.
- The scoby needs sugar to live on – honey, rapadura or sugar substitutes will not work.
Nutrition
Have You Tried Continuous Brew Kombucha?
Leave a comment, I would love to hear your experience!


Tracey says
Love those square jars! I am going to make a batch of your fermented carrots today. Thanks so much for all your great information!
Warmly,
Tracey
xox
Cyndi says
I have 2 2 gallon jars brewing on the counter at all times and another 2 gallon glass jar with a spout that I keep in the fridge. Do you refrigerate after you are done brewing or keep it out? I keep mine in the fridge when done brewing because I like it cold and because I thought that it would continue to ferment more quickly at room temp. It has been working well for me until recently when I noticed that the weight of the dispenser is taking a toll on my refrigerator. I was just curious! I love your jars too!
Dina-Marie says
I refrigerate mine - we actually keg it and put it into a kegerator and have it on tap - we like our cold too!.
Ami Edelstein says
Hi Dina! I wanna start putting my Kombucha in a keg, would love any help you can give
Thanks!
Ami
Dina-Marie says
Ami, we just kegged a 5 gallon batch today! Are there specific questions you have? I'll be glad to answer any!
Annette says
I have a few questions Dina about the process of kegging, as I haven't found much help with this online. So your batch is ready, I assume you have already flavored your Kombucha and are transferring it to the keg. Do you let it sit out for a few days and then put it into the fridge, or do you force carbonate and put it right away into the fridge?
Dina-Marie says
Annette, we go ahead and put it in the kegorator to carbonate it further. I hope you enjoy it and I know we sure do! Feel free to ask any other questions.
Desiree says
I'm really interested in this continuous brew method! I'm using a half gallon jar, quart jars, and a big bowl for my kombuchas... it's a bit of a mess! Would love to get some good equipment to improve my method.
Tamara @ Oh Lardy says
Dina, where did you get those containers? I am having a hard time finding ones like that for continuous brew.
Dina-Marie says
Tamara, I found them at our local Sam's club - they work great for me!
Martine S. says
Visiting you from the Marvelous Mondays link up party. This looks great and I am really interested in getting started. I have my scoby! Just have to do it now!
Cindy (Vegetarian Mamma) says
Very neat! The jars are beautiful!
Thanks for linking up at our Gluten Free Fridays party! I have tweeted and pinned your entry to our Gluten Free Fridays board on Pinterest! :)
Thanks for linking back to the Gluten Free Fridays post!
We had a ton of great looking entries for our Namaste sponsored party last week! Stop by this week to check out the winner that was randomly selected!
Cindy from vegetarianmamma.com
Alex says
What material are those spigots? If they are metal, that is very dangerous. If they are plastic covered in metallic paint, that's not very good either but not as serious a problem.
Dina-Marie says
They are plastic but not painted on the inside.
steve says
I'd like to start kegerating my brew too. Right now, i brew it for 2 week and then secondary ferment it in capped bottles to build up natural carbonation. Am i right in that you skip the secondary fermentation step, and simply pour your primary ferment into the keg and attach CO2 canister to it? I like secondary fermentation because i like adding fruit, ginger to it to flavor the kombucha. not sure if you can do that in a keg. does the CO2 last long?
Dina-Marie says
Hi Steve, yes I do skip the secondary fermentation and just keg the kombucha. The CO2 does last a while but not sure how long because I have never timed it. I would like to try the flavored sometime - I think you could keg it after the second fermentation and it should be fine.
Shelley says
I have never kegged anything. How challenging is that? Where do you get a "kegerator"?
I'm thinking of three large jars: One for original ferment, one for second ferment, and from there put it in the keg, to keep in the fridge. Would this make sense?
Thanks!!
Dina-Marie says
Shelley, that would work! We found our kegerator on Craig's list locally. You can find them in stores and online. It is not difficult to do at all - you just pour your kombucha into the keg, place it in the kegerator, hook up the CO2 and tap and it is ready.
Lori @ Our Heritage of Health says
I love those jars! I've been thinking about starting to make my own kombucha since I love it so much. :) Thanks for sharing with Old-Fashioned Friday!